So you’ve just collected a new art print—congratulations! You may be asking: “now what?” You want to get it hung up on the wall but aren’t yet familiar with framing it yourself or the process of custom framing.
I’ve outlined a few approaches to framing below. I’ve also included pictorial DIY instructions for my favorite way to frame my prints on un-stretched canvas.
various approaches to framing
$$$$ — Hire a local custom framer to carry out the framing job from start to finish. All you need to do is bring your new print into the framing shop. If you don’t want your piece matted or behind glass, you can ask the framer to mount your new print to Gator board before framing it.
$$$ — Hire an online custom framer to complete the framing job for you. Visit a site like Simply Framed, Framebridge, or Framed and Matted to learn more about their process.
$$ — Bring a ready-made frame + your new print to a local framer to hire them to assemble the finished framed product. This might include them cutting a custom mat for your piece if your frame is larger than your print.
$ — Do It Yourself! Purchase a ready-made frame from a site like Craig Frames (my favorite!) and assemble yourself.
If you are going with option #4 (the DIY option), allow me to be your guide…
how to frame-it-yourself
Below, I will show you an easy and beautiful way to assemble one of my prints into a ready-made frame—the result looks similar to an original painting. This is my favorite way to frame my giclee prints on canvas!
Reproductions on canvas do not need to be protected behind glass like reproductions on paper do. Because of this, my customers have the option of either framing with glass or not, depending on their stylistic preference. It can also depend on the conditions of the room where you’ll hang it (Tomato sauce splatters, humidity from the shower, and sticky children fingers all mean you’ll instead want it protected by glass).
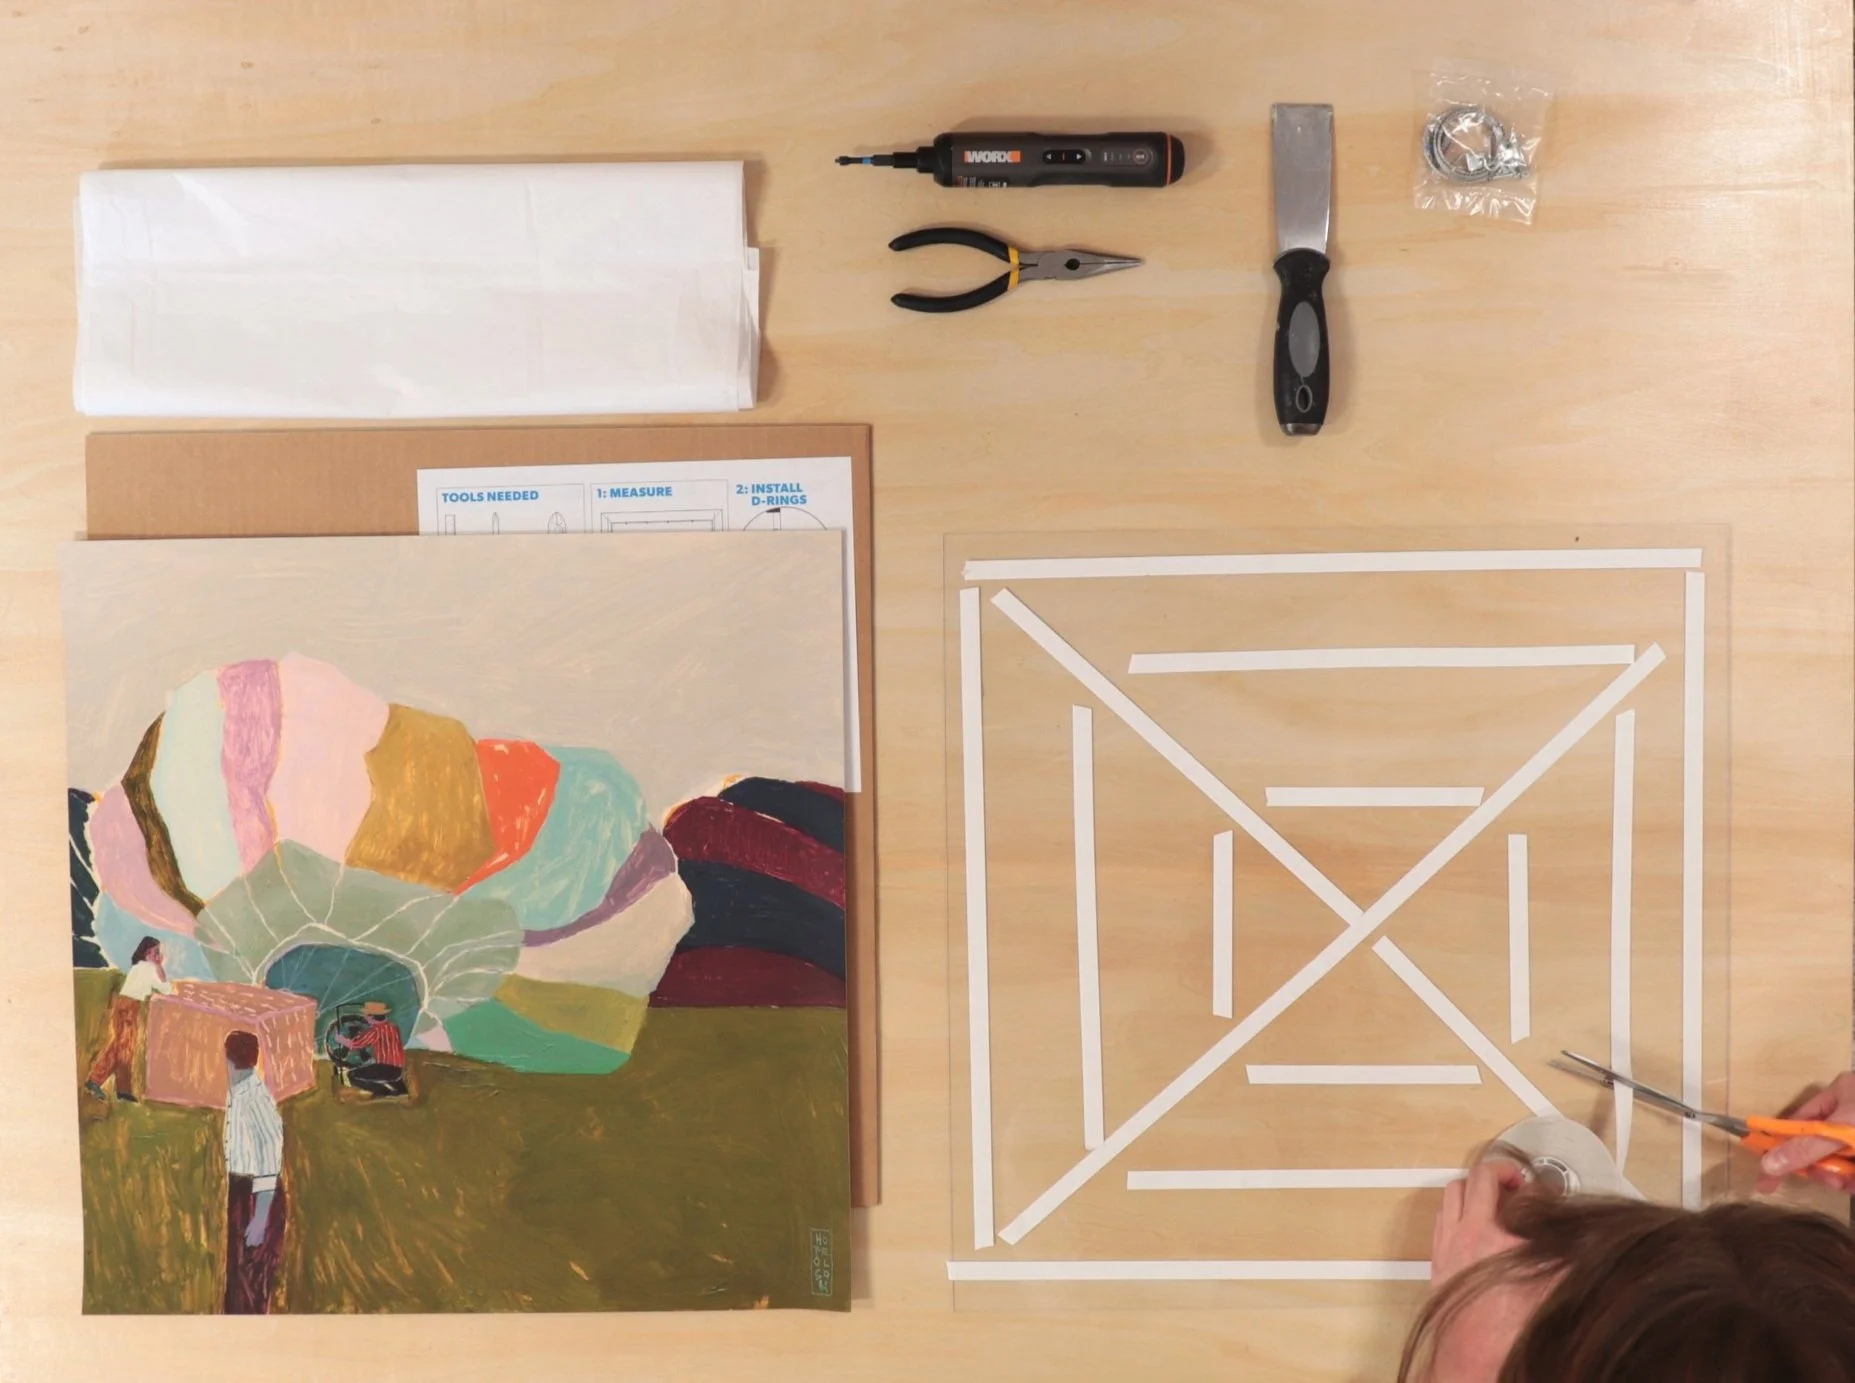
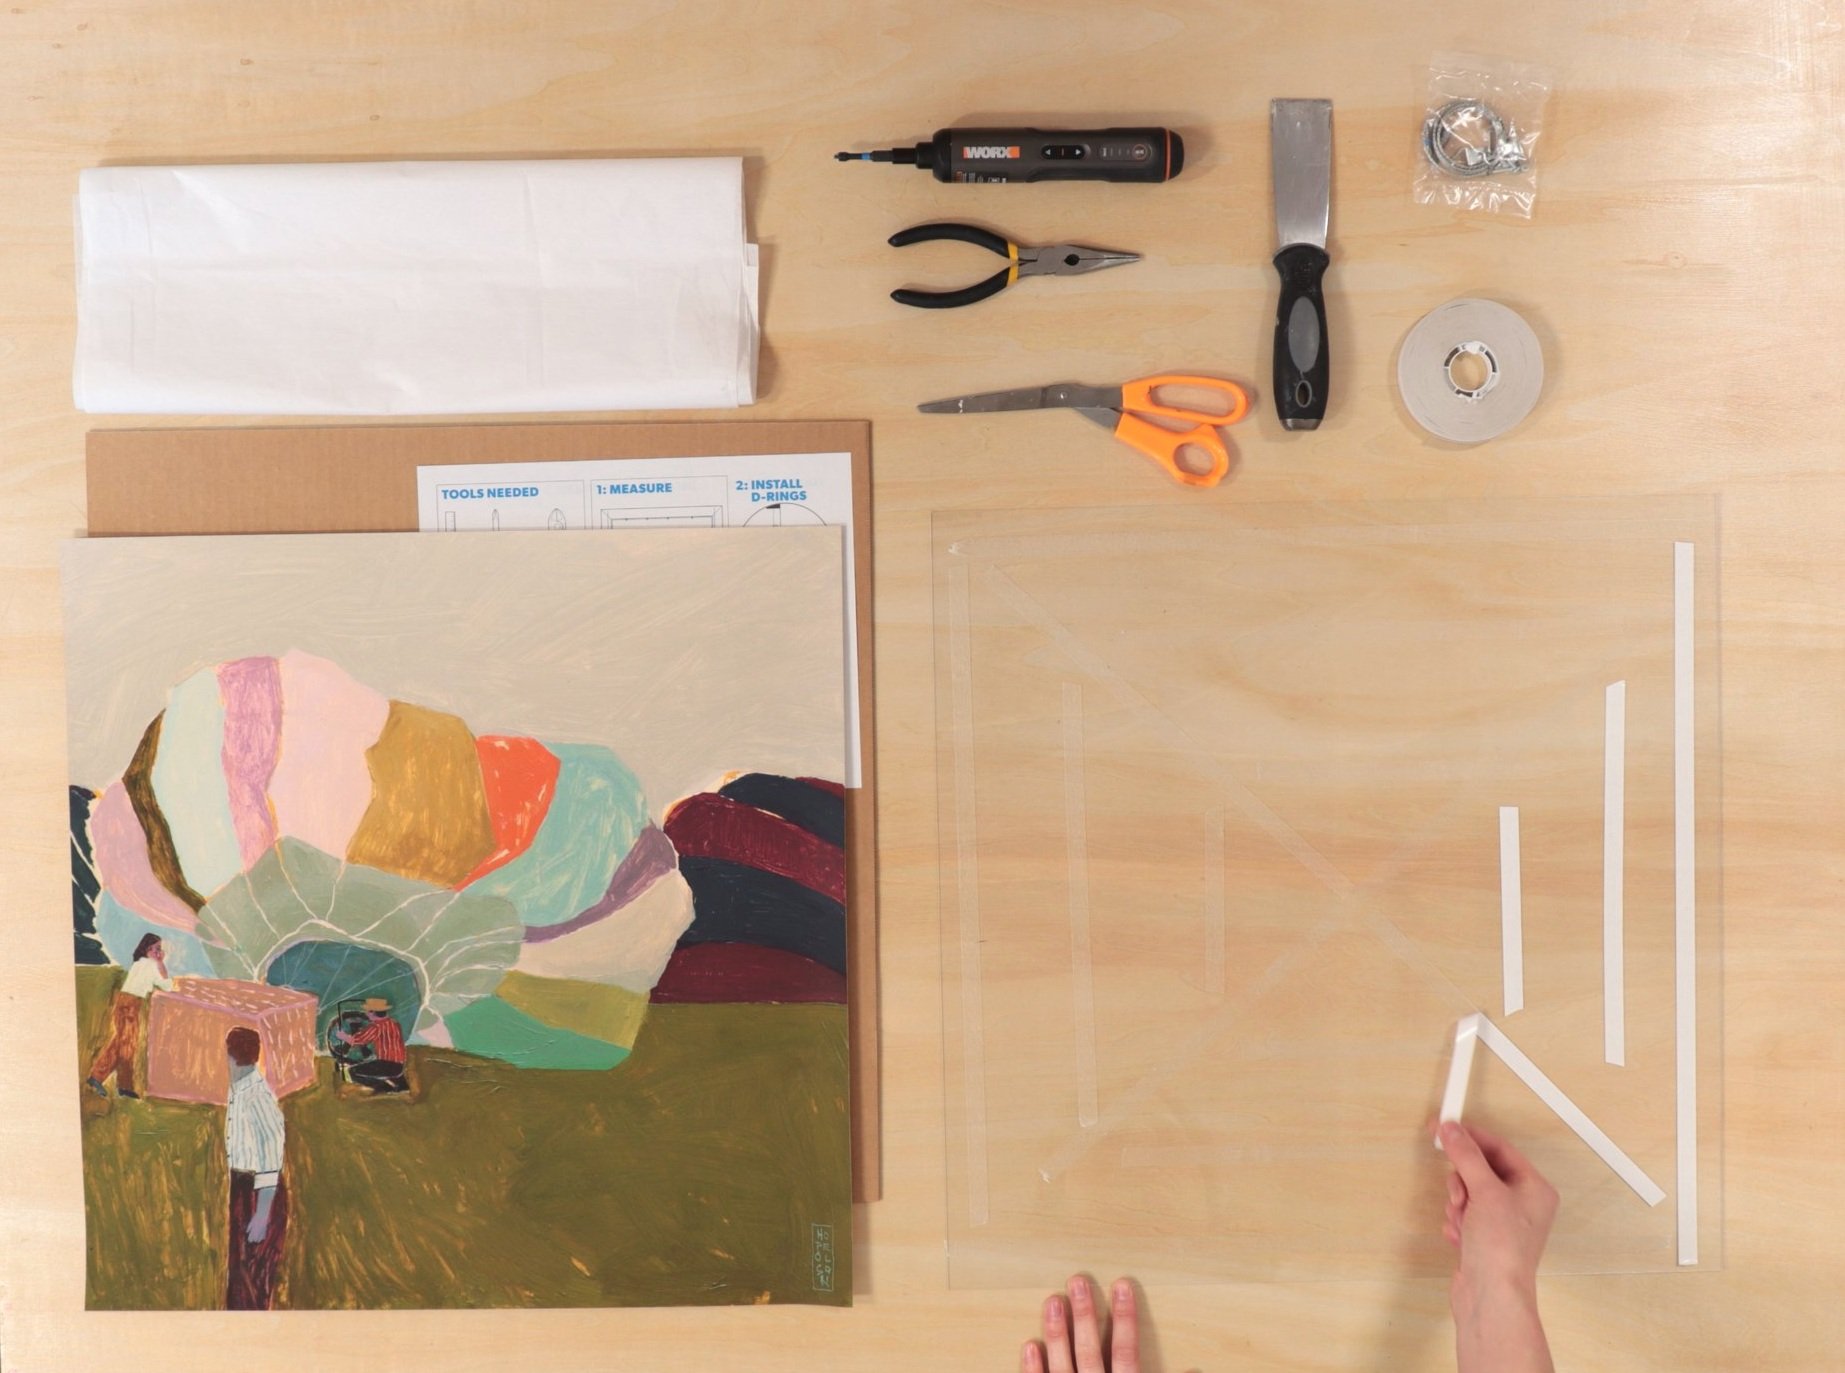
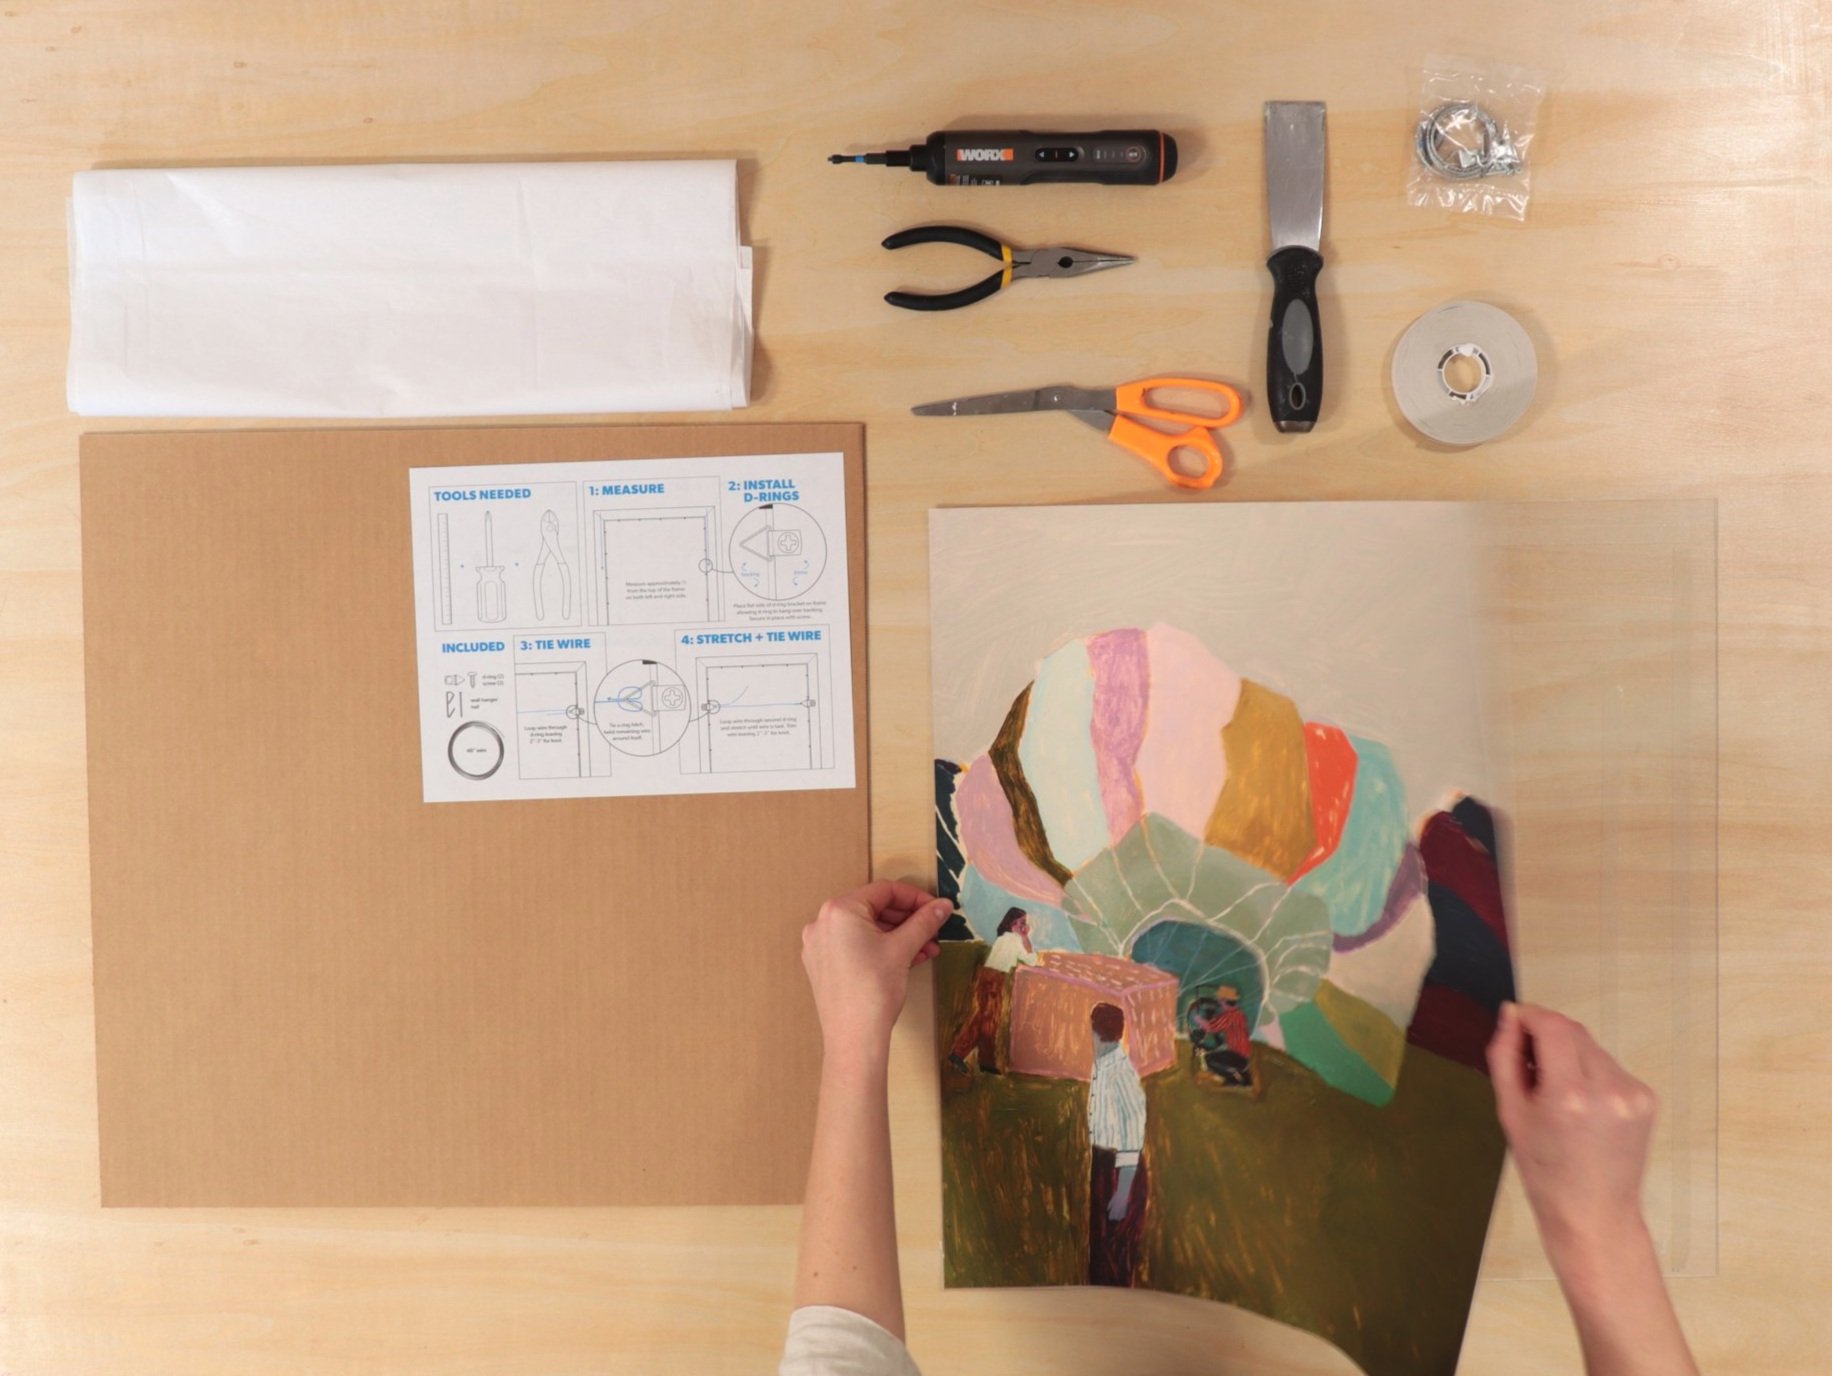
In this tutorial, I will demonstrate how to frame one of my prints so that it is not behind glass. In fact, the print is actually going to be mounted ON TOP of glass. Wait, say WHAT?! Keep reading. It requires a couple extra steps, but the process is pretty simple and the result is beautiful!

what you need:
A frame (pictured is Craig Frame’s Wishbone Light Brown frame, 20 x 20 inches)
An art print on canvas (print must be on canvas; this tutorial would damage a print on paper)
Putty knife or a kitchen butter knife
Double-stick art tape (a tape roll comes free with every Hope Olson print shipment)
Scissors
Non-printed paper or tissue paper
Screwdriver
Wire cutters
2 D-Rings, 2 screws, and picture wire (many ready-made frames come with these)